A perch bite on a mormyshka can be surprisingly easy to miss. The indicator stops trembling, straightens slightly or bends just a little farther than it did on the previous lift. React to that change and the apparently lifeless hole produces a fish. Keep working the rod without watching the tip and the opportunity passes unnoticed.
That delicate contact is what makes mormyshka fishing so absorbing. A tiny weighted hook, fine line and a sensitive indicator let you present a small mouthful precisely, then see what the fish does with it. Among ice fishing jigs for perch, a mormyshka is particularly useful when a shoal is feeding on small food or has stopped attacking a spoon or balance jig.
Across northern and eastern Europe, mormyshkas are part of the winter perch angler’s tackle box. Their value continues beyond first ice, especially when a small, carefully worked bait brings a response that larger lures fail to produce. The same approach also has a place in North American yellow perch fishing, with tackle and bait choices adapted to the water being fished.
Build a Sensitive Mormyshka Rig
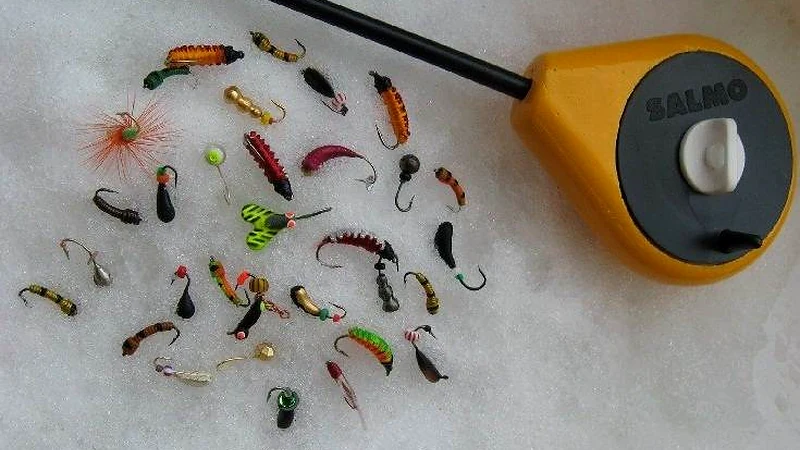 A mormyshka has its hook built into a small weighted body. For the presentation described here, fish it vertically on its own line, with a natural bait, a tiny artificial dressing or no bait at all. Start with one lure tied directly to the line. A small tungsten jig does not need a large snap, swivel or extra split shot immediately above it.
Use a light ice rod around 25–40 cm (10–16 in) long, with a small reel and a sensitive tip indicator. The European spring nod, also called a spring bobber, shows changes in tension and helps you maintain a fine trembling action. Match it to the loaded lure: with the jig suspended, it should bend visibly while retaining room to straighten or dip farther. An indicator that barely moves conceals lift bites; one folded over by the jig’s weight gives you little useful control.
For ordinary perch fishing with a 3–4 mm tungsten body, monofilament around 0.12 mm is a sensible starting point. Carry 0.10 mm for smaller, delicate presentations and 0.14 mm for larger fish or a heavier jig. The important test is how the complete rig behaves. If the line hangs in coils and the jig takes an age to reach depth, first check line condition and increase jig weight where needed. Continually working the rod harder will not cure poor contact.
Tie the lure so that it hangs in its intended position, with the hook accessible to a fish approaching from below or beside it. Eyed and through-body designs need different attachment methods; our guide to tying a mormyshka to fishing line explains both. Check the knot and the line where it meets the lure, particularly around the hole in a tungsten body. Rough edges can damage fine mono before a fish ever tests it.
Choose Size and Shape for the Presentation
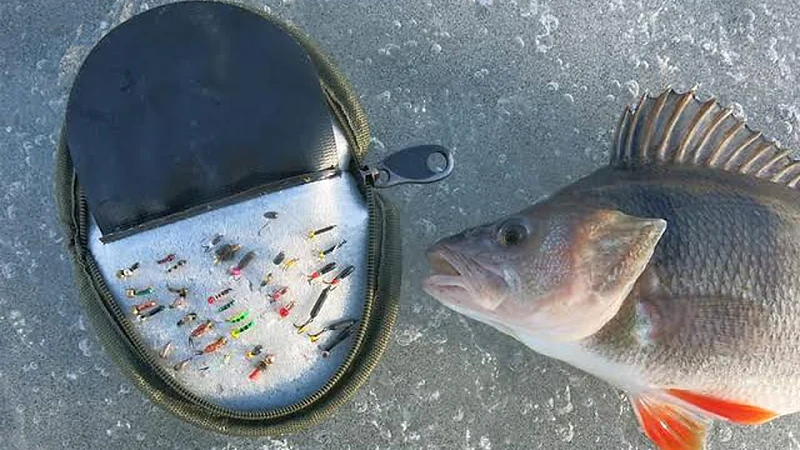
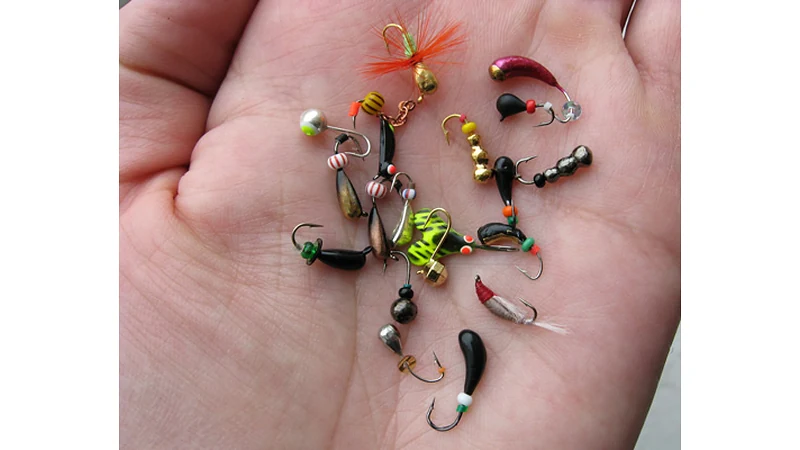 A compact tungsten drop or round-bodied mormyshka is a dependable starting choice. Carry a small selection of sizes so that you can adjust the presentation without changing the whole rig:
- 2.5–3 mm: Choose this smaller profile for shallow water or perch that repeatedly inspect a larger jig without taking.
- 3–4 mm: Start here for everyday fishing and learning the method in sheltered water at roughly 2–5 metres (7–16 ft).
- 4–5 mm: Use a larger model when depth, a slight current or an actively feeding shoal makes a quicker descent useful.
Tungsten provides weight in a small body, helping you reach the fish and maintain contact without making the bait unnecessarily bulky. Compare actual weights when shopping: two jigs with the same stated diameter can have different shapes, hooks and total mass. Choose enough weight to control the presentation, then adjust the profile to the fish’s response.
Shape gives you a worthwhile change after size. A drop or ball is a straightforward starting choice for baited fishing. An elongated or curved body offers a different outline and balance, while ant-shaped and bead-dressed designs give a bare lure more visual detail. Learn two or three shapes well before filling a box with unfamiliar patterns. Check each one in shallow water where you can see the effect of a fine tremble and a slow lift.
For colours, take a dark finish such as black and a reflective alternative such as silver, copper or gold. Start dark in bright, clear conditions and try the reflective jig when light is poor or the water is coloured. Add a red or yellow bead or short piece of tubing to a suitable bare jig for a contrasting point of interest, keeping it clear of the hook point and gap. Once a colour produces bites, concentrate on repeating the depth and movement rather than immediately searching for another shade.
Baited or Bare: Give Each a Clear Job
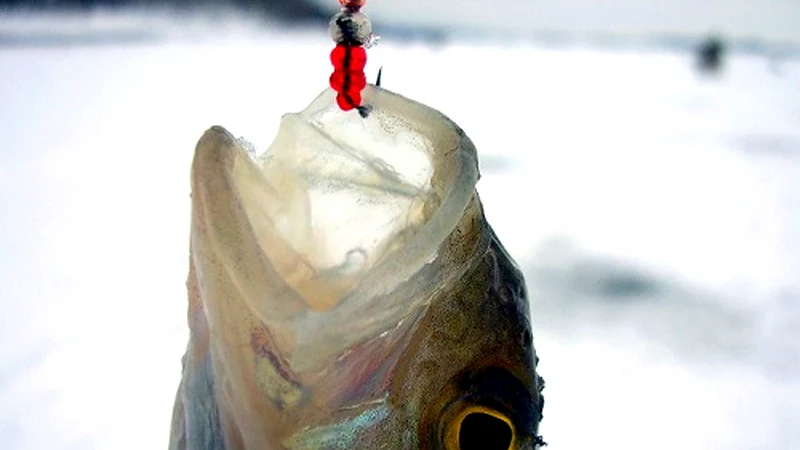 Start with a baited mormyshka if you are learning. One or two bloodworms, or a small maggot where permitted, provide a compact natural mouthful. Hook the bait lightly, leave the point exposed and check it after a missed take. A damaged bait with little movement deserves replacing before another long sequence of jigging. Keep bloodworms protected from freezing and temperature shocks; our bloodworm storage guide covers keeping them in good condition before the trip.
A bare mormyshka earns its place when you want to fish without rebaiting or offer a different stimulus to a shoal. Use a design intended for baitless fishing, then build a smooth, repeatable rhythm. Beads and small dressings add detail, but the lure still needs a controlled movement. If your wrist turns every lift into a series of large kicks, reduce the movement before changing the jig.
A tiny soft-plastic larva is another practical option. Mount it straight and check that it leaves enough hook gap for a perch to take the lure cleanly. Keep the dressing proportionate to the body: an oversized plastic tail changes both the profile and the fall, taking you away from the small presentation you chose. This is especially worth checking when fish tap the tail but fail to load the rod.
Three Mormyshka Presentations to Learn First
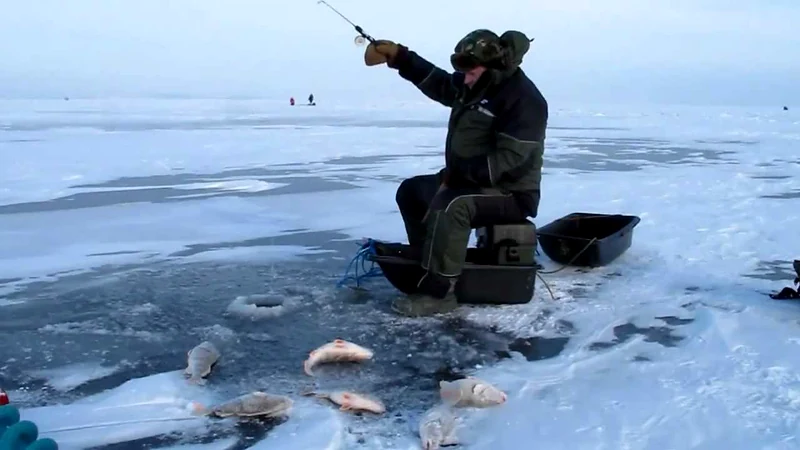 Settle into a position that lets you hold the rod steadily, with the line running freely through the centre of the hole. Clear slush before starting and establish the bottom depth. Then lift the lure just clear of it and watch how the nod sits under the jig’s weight. That resting bend is your reference for detecting the next change.
A slow trembling lift
Start roughly 5–10 cm above the bottom. Make small, regular movements with the rod tip while slowly raising the lure through about 20–40 cm. Think of a tremble rather than a succession of sharp strikes. At the top, hold it still for 3–5 seconds, then lower it under control and repeat. Add a short stop halfway up if fish follow without committing.
This is the first presentation to learn because it keeps the bait moving while giving you a clear way to compare responses. If bites come halfway through the lift, begin the next drop close to that level instead of returning automatically to the lake bed. Increase the height of the lift when fish continue rising with the lure, keeping the movement smooth as you follow them upwards.
Bottom contact followed by a quiet hover
Lower the jig gently until it touches clean bottom, then make two or three light taps. Lift it around 5–10 cm and hold it still for several seconds before adding a fine tremble. On a soft bottom, use only a brief touch: repeatedly burying a tiny jig in silt hides the hook and makes subtle takes difficult to recognise.
This sequence gives a baited mormyshka a useful contrast between movement and stillness. Alternate the quiet hover with a short trembling lift, and note which part produces a response. When fish take during the stationary phase, lengthen that phase and reduce the amount of movement between pauses.
Short hops for fish that respond to movement
Lift the mormyshka about 5–10 cm with a compact wrist movement, then follow it down without allowing a large loop of slack line to form. Pause briefly, make another hop and continue through a small band of water. Keep the movements noticeably shorter than the strokes you would use to send a balance jig gliding away from the hole.
Use this livelier presentation when perch take confidently or rush towards a moving bait. If they begin touching the jig without taking it properly, return to the slower lift or hover. Watch the nod throughout every sequence: perch take during the rise, descent and pauses. A pause is a valuable part of the presentation, not the only moment when a fish can bite.
Read the Nod and Set the Hook Cleanly
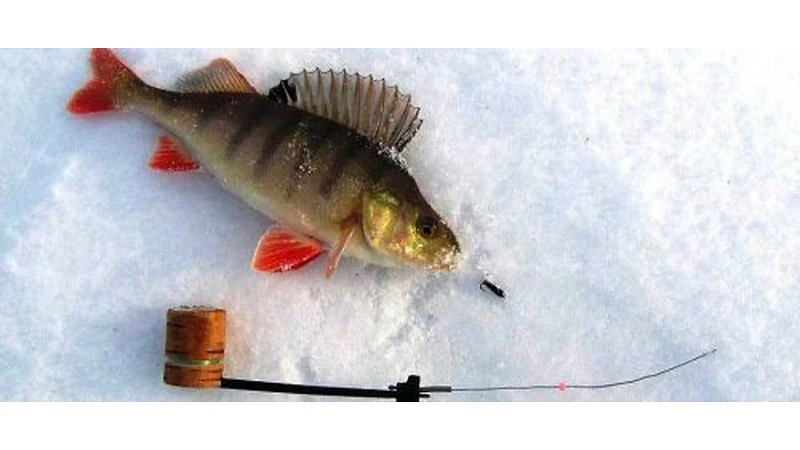 The obvious bite pulls the indicator down. A lift bite does the opposite: a perch takes some of the jig’s weight and the nod begins to straighten. A sudden interruption in its regular movement is also worth a prompt, controlled lift of the rod. In wind, brace your rod hand and keep the indicator low enough to reduce disturbance so that movement from a fish is easier to separate from shaking tackle.
Set the hook with a short lift, then keep steady tension. A tiny sharp hook on fine mono needs controlled pressure, and a broad overhead strike risks breaking the line or tearing the hook free. Let the rod cushion the fish and use the reel or your normal controlled hand-lining technique to bring it up. Keep the line away from sharp ice at the rim; do not try to haul a fish through while the line is sawing against the edge.
Once the perch is landed, check the bait and lower the jig back to the successful level promptly. Prepare spare tackle and unhooking tools before the session so that a feeding spell is spent fishing. Handle fish briefly with wet hands and keep those intended for release off snow and ice. Larger fish deserve support under the body rather than being lifted on the line.
Put the Jig in Front of a Shoal
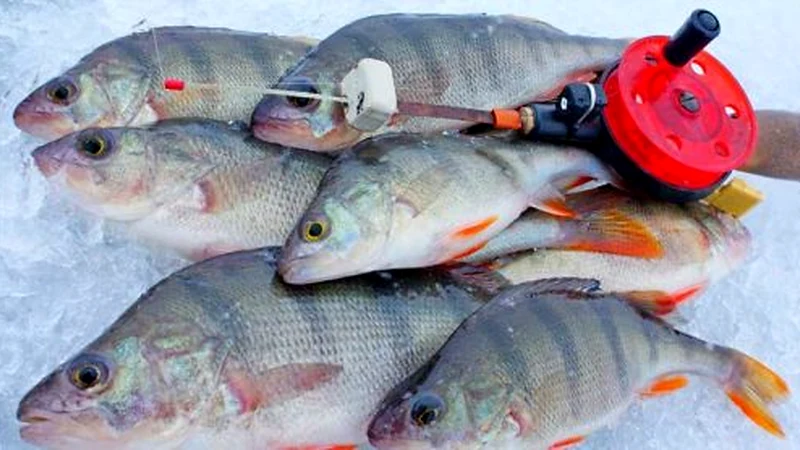 Begin beside remaining vegetation, submerged timber or a clear change in depth. A weed edge around 1.5–3 metres and a nearby slope into 3–6 metres give you different levels to investigate without searching randomly. On deeper lakes, use the sounder and known autumn locations to choose the working depth. Check shallow cover as well as deeper edges: a small mormyshka is useful wherever feeding perch can be reached with a controlled vertical presentation.
Prepare a short search across a feature, with holes roughly 5–10 metres apart where the assessed ice route allows. Fish a few complete sequences near the bottom and slightly higher. Without bites or signs of fish, move after around two or three minutes; where sonar shows perch inspecting the jig, spend that time refining the presentation. Our first ice perch fishing guide covers the wider search, including when to use spoons and balance jigs to locate fish before switching to a mormyshka.
Plan the first visits around daylight, giving the morning and later afternoon proper attention. Stay with a productive feature through changes in activity, and note the light conditions beneath the ice. Snow cover, water clarity and depth matter more to presentation than finding a particular air temperature on the forecast. A quiet middle of the day is a good time to investigate nearby depths and return to the holes that produced earlier.
What to Change When the Bites Fade
 Several quick fish followed by silence is a familiar part of perch fishing. First repeat the successful depth and movement, then check slightly above and below it. A shoal can move sideways along a contour, rise in the water or remain nearby while becoming less willing to take. Your next move should follow what you see on the nod, line or sounder.
| What happens | Make this adjustment first |
|---|---|
| Repeated taps without hooked fish | Replace damaged bait, check the hook point and leave the hook gap clear |
| Fish approach on sonar, then turn away | Reduce movement and introduce a longer stationary pause |
| Fish inspect the small jig but you cannot control it at depth | Try a heavier compact tungsten model, keeping the bait profile small |
| Takes occur above the bottom | Reset your starting depth to fish just above that level |
| A previously productive hole goes quiet with no fish showing | Try a neighbouring hole along the same depth contour, then revisit later |
Make one change at a time. A smaller bait, a slower lift or a different shape gives you useful information when the depth remains the same. If the hole is empty, changing through every colour in the box spends valuable daylight away from the fish. Equally, leave a productive area only after checking its immediate surroundings; the shoal has often shifted a short distance rather than disappeared from the feature.
Using the Same Approach for Yellow Perch
North American yellow perch, Perca flavescens, are a different species from European perch, Perca fluviatilis. The small-jig approach is useful for both: balance the lure with light tackle, keep the hook clear and adjust movement to the fish’s response. Anglers in the USA and Canada who already fish small tungsten ice jigs will recognise much of this method; a sensitive spring bobber makes the delicate takes particularly easy to follow.
For a North American setup, begin with light line in the 2–4 lb class and check the actual diameter against jig weight; breaking strain alone does not describe how it handles a tiny lure. A longer ice rod also works, provided its tip or spring bobber clearly registers the jig’s weight. A small locally permitted larval bait, such as a waxworm or maggot, supplies a familiar alternative to bloodworm. The Minnesota DNR’s perch ice-fishing guidance also emphasises subtle movements for nearby fish and choosing enough jig weight to control the line. Use the lake’s own seasonal pattern and local rules when choosing where and when to fish.
Fish Established Ice, Not a Date on the Calendar
Use this method on waters where ice fishing is permitted and current local assessments support the route and fishing area. Ice varies around springs, currents, inlets and shoreline structures; one thickness reading does not establish the safety of a trip. Carry ice picks, suitable flotation equipment and a throw line, and fish with a companion. In Britain and Ireland, follow the RLSS UK guidance on frozen water rather than treating a frozen canal or pond as an ice-fishing venue.
Check rules on bait, feeding and hook arrangements at the chosen fishery, especially before using multi-hook baitless patterns. Once the location and equipment are settled, give the small jig your attention. Learn its resting weight, produce a movement you can repeat and respond to the slightest meaningful change in the nod. That is where mormyshka fishing becomes a controlled, absorbing way to catch perch through the winter.