Perch are excellent eating, but their small, firmly attached scales make preparation less inviting. Scrape carelessly and the scales end up across the worktop; pull at the skin without freeing it first and good flesh comes away with it. The easiest solution is to decide what you want to keep before picking up the knife.
For crisp skin, scale the fish and leave its covering intact. For a quicker preparation without scraping, peel the skin away with the scales still attached. Previously frozen perch offer a third option: skin them while the flesh is firm enough to handle cleanly.
This guide covers European perch (Perca fluviatilis). The same basic techniques also apply to North American yellow perch (Perca flavescens), so anglers on either side of the Atlantic can follow the illustrated skinning method below.
Choose Your Method Before You Start
The main difference between these methods is what remains on the fish. Scaling preserves the skin for cooking; skinning removes it from the flanks and avoids most of the scattered scales.
| Method | What you keep | When to choose it |
|---|---|---|
| Scale the perch | Skin, flesh and bones | You want crisp skin or a whole fish for frying or baking |
| Peel off the skin and scales together | A cleaned, bone-in body | You want to prepare perch without scraping off the scales |
| Skin a previously frozen perch | A cleaned, bone-in body | Your fish has already been stored in the freezer |
For skin-on cooking, start with a fish scaler and controlled strokes. For skin-off preparation, follow the photographs: they show how to open the skin along the back, peel it down both sides and separate the body from the head and internal organs.
Set Up for a Clean, Controlled Job
Use a firm chopping board with a damp cloth underneath to stop it sliding. Keep the tools and waste bowl within reach so you do not have to move around the kitchen with slippery hands.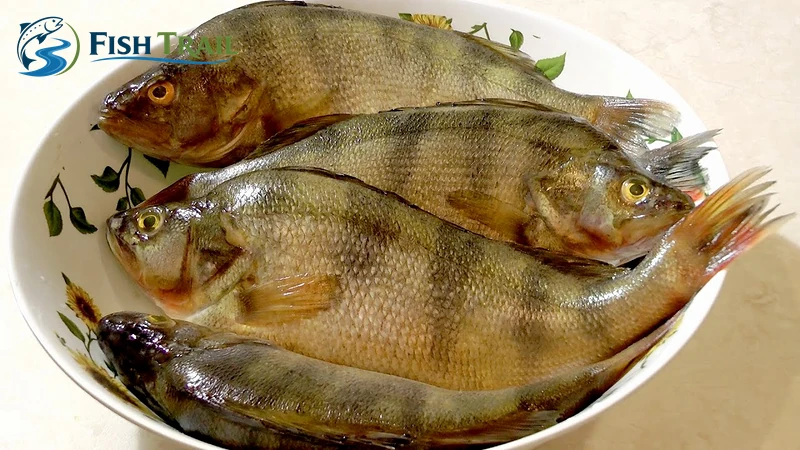
You will need:
- A sharp, sturdy knife with a tip you can control.
- Kitchen scissors for trimming fins and the tail.
- A fish scaler if you are keeping the skin.
- Kitchen paper for gripping and wiping the fish.
- A deep tray or bowl for collecting scales and offcuts.
Work with chilled fish and keep the rest of the batch in the fridge while preparing one at a time. Perch have sharp dorsal spines and pointed edges around the gill covers: establish a secure grip before making each cut, and keep your supporting hand out of the blade’s path.
For fish you have caught yourself, check local retention rules and the fishery’s conditions before taking them home. This matters particularly on British coarse fisheries, where permission to fish does not automatically include permission to remove the catch.
Method 1: Scale the Perch and Keep the Skin
Choose this method when you want to fry or bake perch with the skin on. A fish scaler lifts the scales while leaving the skin in place, helping the delicate flesh hold together during cooking. Work in small patches with controlled strokes rather than trying to clear the whole flank in one movement.
Step 1: Position the Fish and Prepare the Scaler
Lay the perch on its side on a stable chopping board inside a deep tray. Hold the tail securely with kitchen paper and keep your supporting hand clear of the sharp fins. The photographs show a scaler with a cover that collects some of the loosened scales; empty it regularly so the cutting surface stays clear.
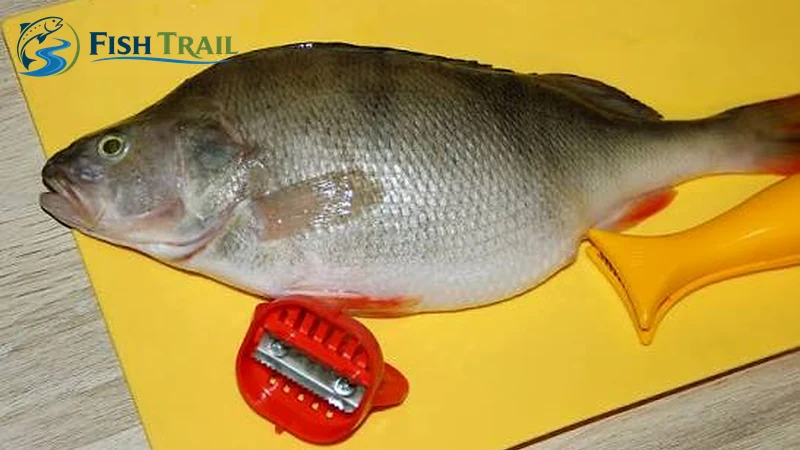
Step 2: Remove the Scales from Tail Towards Head
Starting near the tail, move the scaler towards the head against the direction of the scales. Use short strokes and enough pressure to lift the scales without digging into the skin. Clear one patch before moving forwards, then turn the fish and repeat on the opposite flank.
Keep the tool close to the body rather than flicking it upwards. Collect loose scales in the tray as you work, and empty the scaler’s cover before it becomes packed.
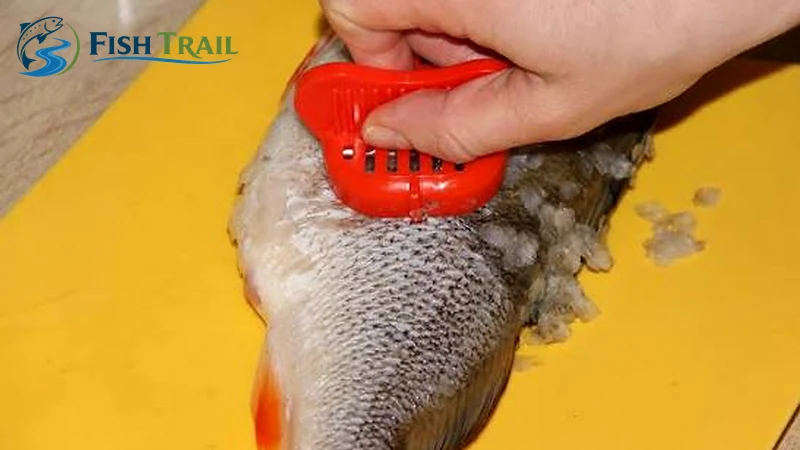
Step 3: Check the Shoulders, Belly and Fin Bases
Inspect both sides, paying particular attention to the shoulders behind the gill covers, the belly and the narrow areas beside the fins. These are the easiest places to miss. Gently feel against the direction of the scales, keeping clear of the spines, and remove any remaining rough patches with short, precise strokes.
The aim is clean skin with the flesh beneath it undamaged. Wipe away loose scales with kitchen paper before moving on to gutting.
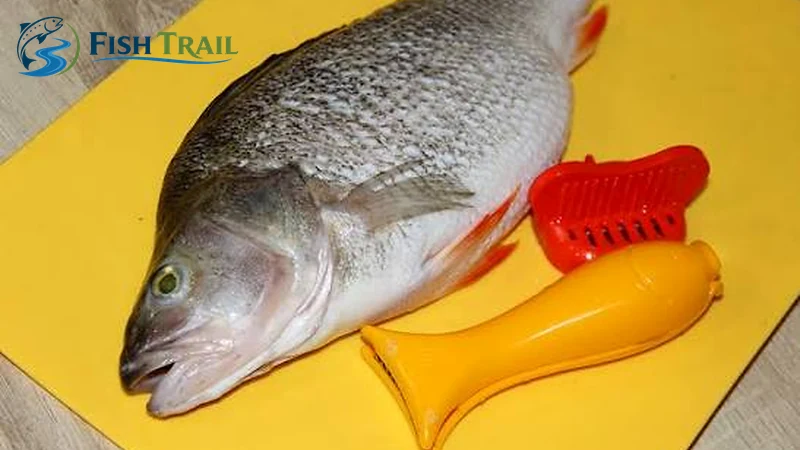
For particularly stubborn scales, a brief hot-water treatment is an optional aid. Place the fish in a heatproof basin, keep your hands clear and treat a small area with a brief splash of freshly boiled water before testing it with the scaler. Avoid soaking or repeatedly heating the fish: excessive heat starts cooking the outer flesh and makes the skin more liable to tear.
Once scaling is complete, trim unwanted fins with kitchen scissors. Make a shallow belly incision from the vent towards the head, keeping the knife tip away from the internal organs. Remove the entrails, clean out the cavity and remove the gills if you are leaving the head attached. Pat the fish dry before seasoning; a dry surface is particularly important when frying perch for crisp skin.
Method 2: Peel Off the Skin and Scales Together
This method avoids scraping altogether. You loosen the skin along the back, separate it from the flesh with your thumb, then open it down both flanks. The body is released while the head, much of the skin and the internal organs remain together.
The important movement is separating the skin before pulling it. Keep the fish supported on the board and work gradually, leaving the flesh on the body rather than tearing it away with the skin.
Step 1: Open the Skin Along the Back
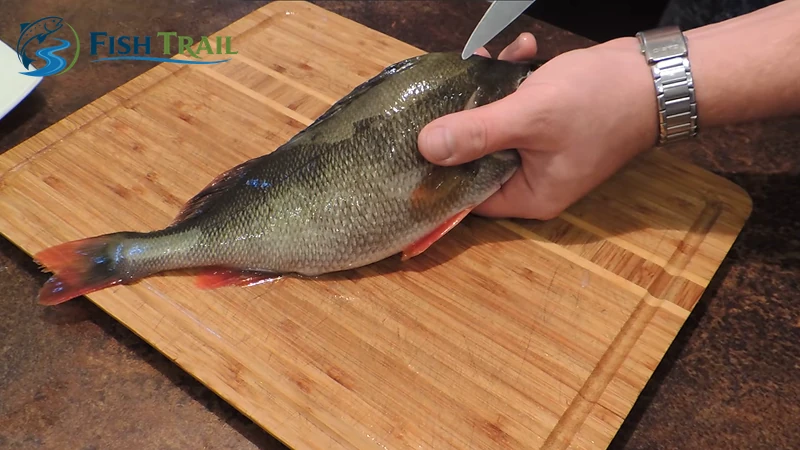
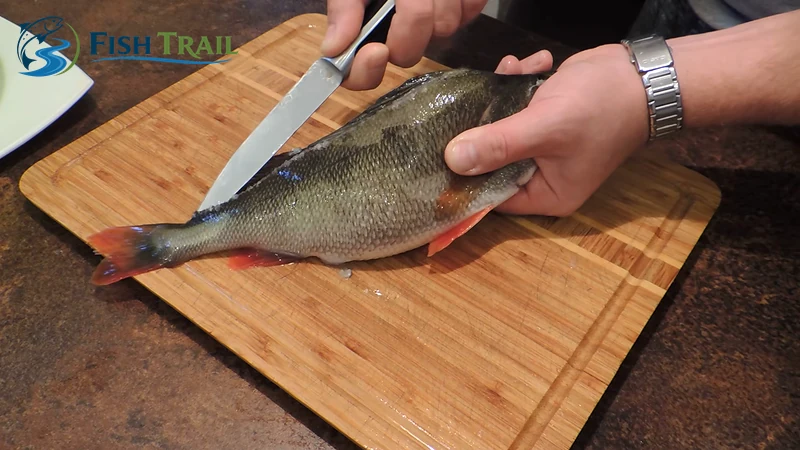
Place the perch belly-down with its back facing upwards. Starting just behind the head, make a shallow incision through the skin beside the dorsal fin and continue towards the tail. Follow the fin bases closely, using the knife tip to free the skin without cutting deeply into the flesh.
Open the skin sufficiently to give yourself an edge to lift on each side of the back. Keep the cuts shallow: removing a strip of flesh here wastes meat and makes the next stage untidy.
Step 2: Work Your Thumb Beneath the Skin
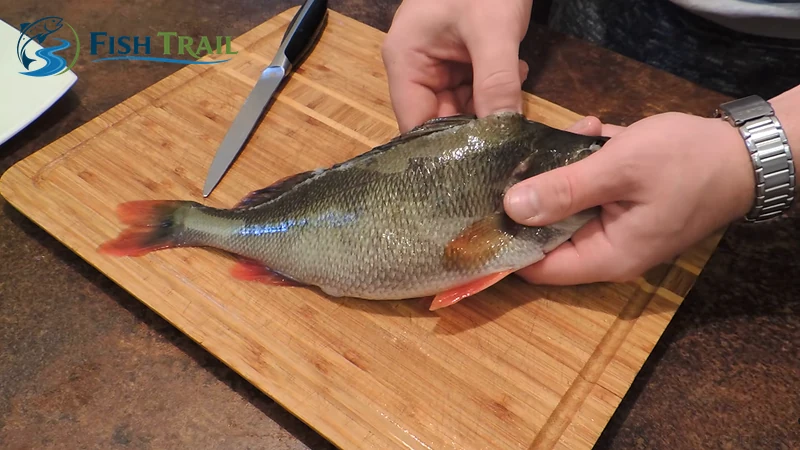
Set the knife aside. Lift a loosened edge of skin near the head end and ease your thumb between the skin and the flesh. Use short, gentle movements to widen the separation, keeping your fingers clear of the dorsal spines.
Do not try to pull the whole covering off immediately. First create enough separation for the skin to fold away without taking chunks of flesh with it.
Step 3: Peel the Skin Down Both Flanks
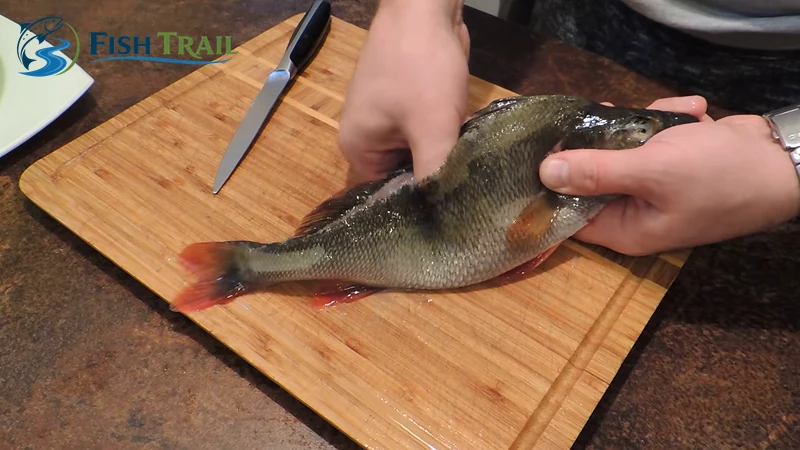
Continue working the skin down towards the belly, supporting the fish as you go. Repeat on the opposite side until both flanks are exposed and the loose skin opens out like a jacket.
Leave the remaining attachments around the underside and tail for now. The aim at this stage is to free the sides of the body while keeping the skin sufficiently intact to collect the waste during separation.
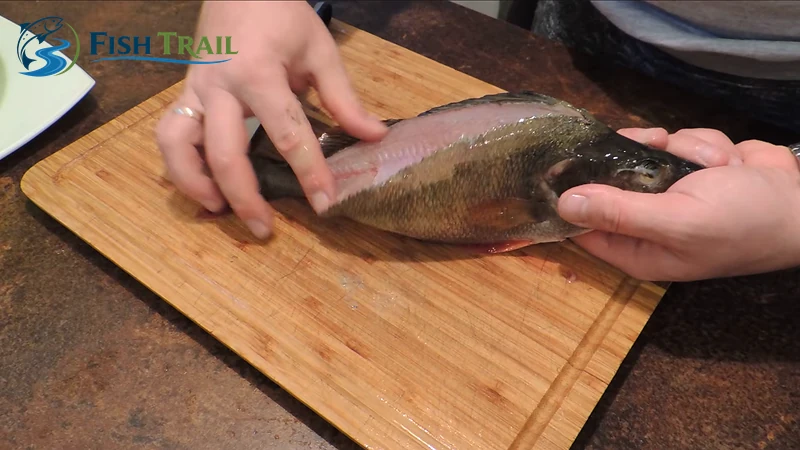
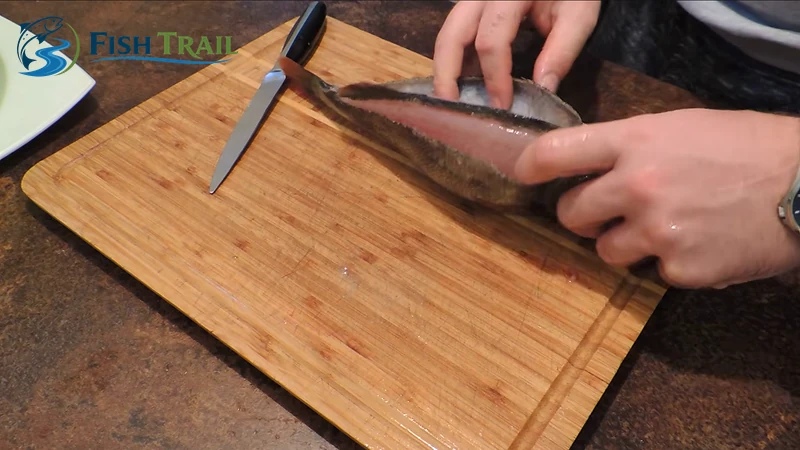
Step 4: Cut Through the Backbone Behind the Head
Lay the fish securely on the board and hold the head steady. Make a controlled cut immediately behind the head, through the flesh and backbone, while leaving the underside attachments intact.
Use a sturdy blade and keep your fingers away from the cutting line. Avoid sawing blindly through the belly and internal organs: the next steps are easier when those remain together with the head and loose skin.
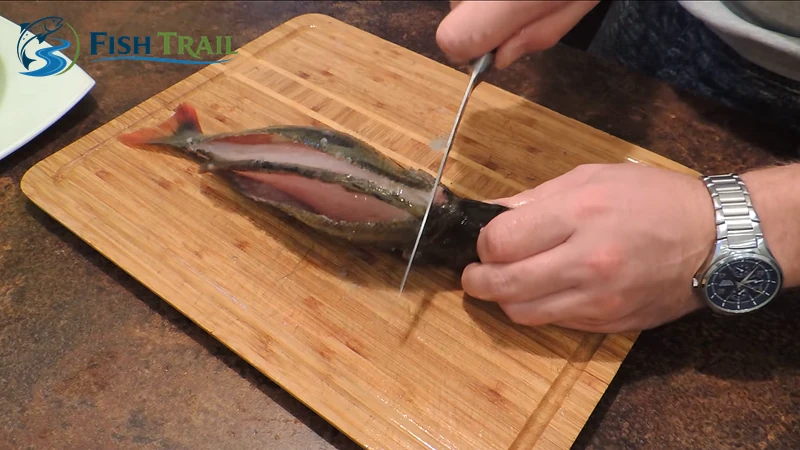
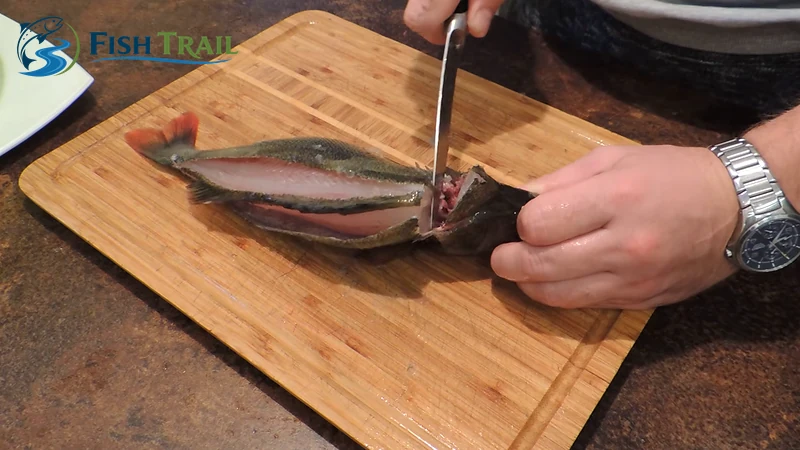
Step 5: Release the Body at the Head End
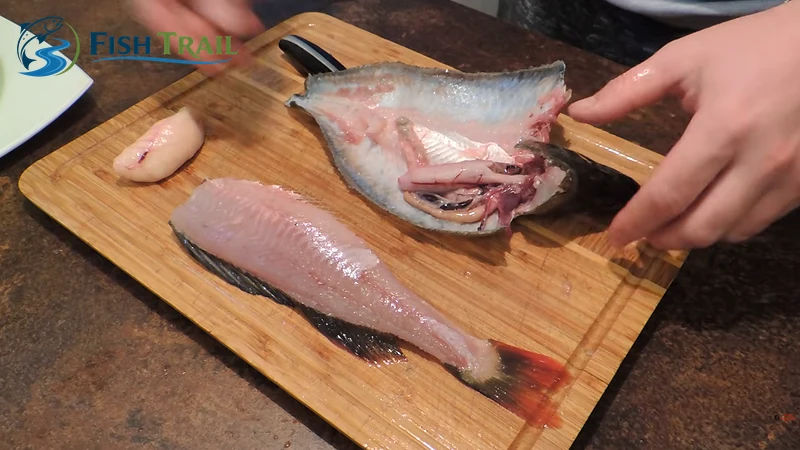
Put the knife down again. Hold the head and loosened skin with one hand, then lift the exposed body slightly with the other. Work a fingertip into the opening behind the cut to ease the body away from the internal organs and remaining membranes.
Use the fingertip to guide the separation rather than digging into the flesh. If a tough attachment holds everything together, set the fish down and cut that attachment carefully before continuing.
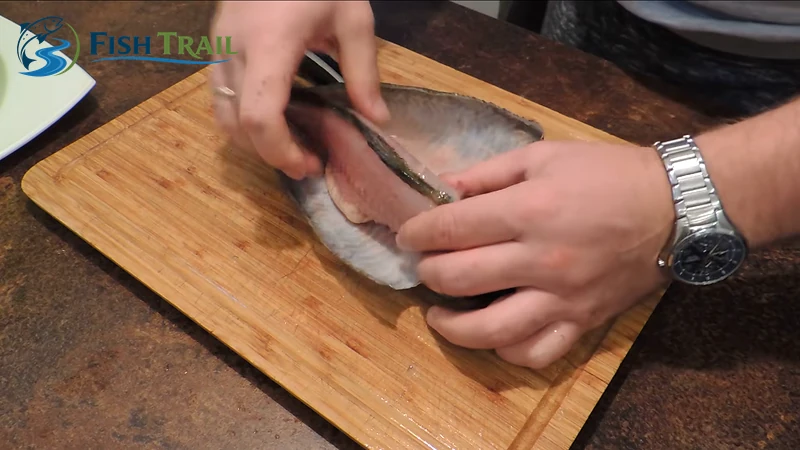
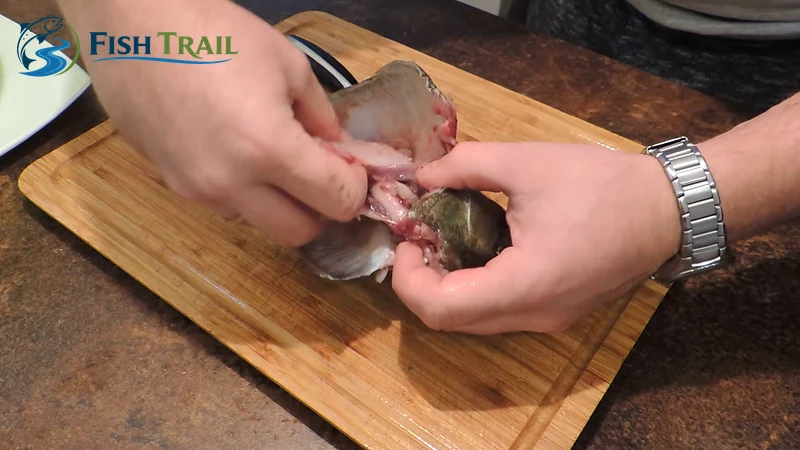
Step 6: Lift the Body Clear of the Skin and Organs
Continue easing the body out of its loosened covering, keeping the internal organs with the head and skin. Support the flesh throughout the movement and release any remaining attachment near the underside or tail instead of pulling sharply.
You should finish with the exposed body in your hands and most of the waste together on the board. Check the cavity before moving the fish to a clean plate: some tissue or organs still need removing by hand.
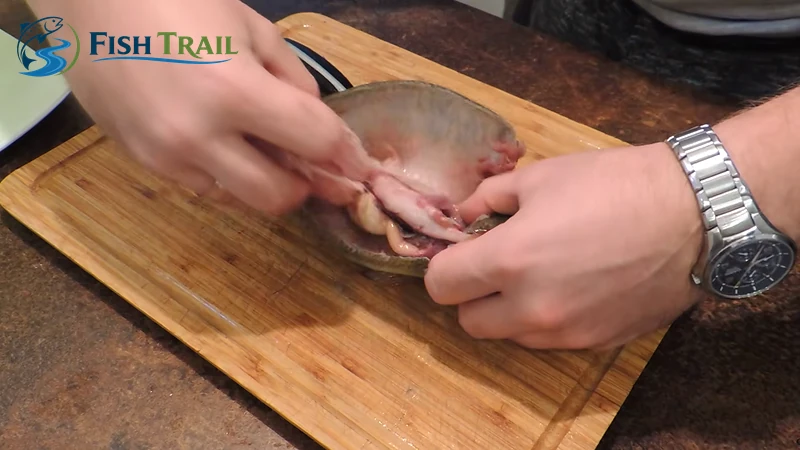
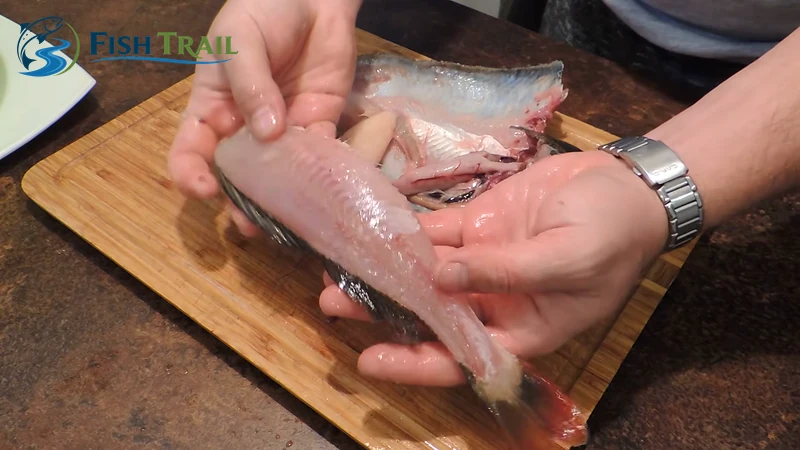
Step 7: Check and Finish the Cleaned Perch
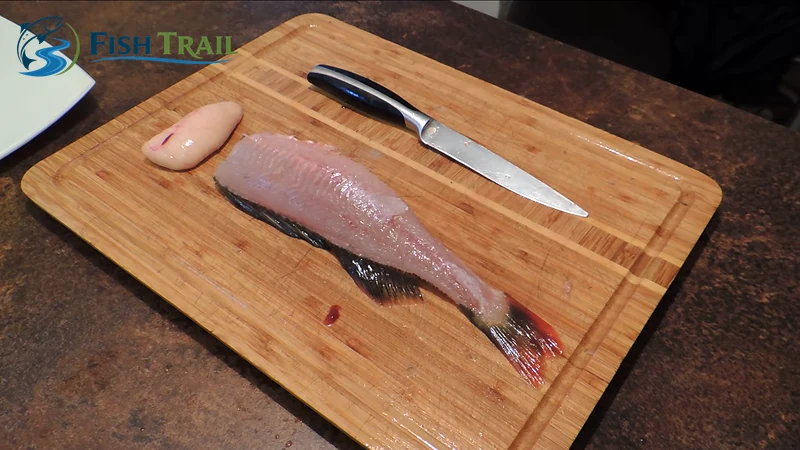
Inspect the body for remaining organs, dark blood along the backbone and patches of skin or loose scales. Wipe the cavity clean with kitchen paper and use scissors to trim unwanted fins and the tail. The final photographs show that the tail and some fin bases are still present at this stage; trim them to suit the way you intend to cook the fish.
This is a cleaned, bone-in perch body, not a boneless fillet. The backbone and ribs remain. Leave the fish whole for cooking and remove the bones when serving, or fillet it separately if you want boneless portions.
Method 3: Skin a Previously Frozen Perch
A previously frozen perch is easier to handle once its outside has softened while the flesh remains firm. Let it reach this stage in a covered tray in the fridge. The knife should enter with a controlled cut; if the fish is still hard enough to require force, leave it to thaw further.
Free the skin edges with shallow cuts beside the dorsal fin and around any lower fin bases that obstruct peeling. Lift the skin near the tail end and peel towards the head, keeping the pull close to the body. Work on the second side in the same way, supporting the flesh throughout. Cut off the tail if it prevents you getting a secure purchase on the skin.
Remove the head and any remaining internal organs, then inspect the cavity and trim leftover skin. For perch that were gutted before freezing, concentrate on removing the skin and checking for residual blood or tissue. There is no need to freeze a fresh fish simply to use this approach.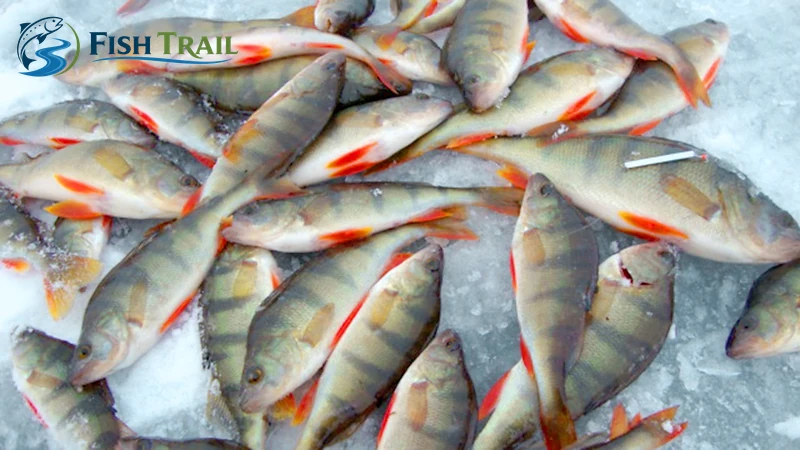
After preparation, return the fish to the fridge and allow it to thaw completely before cooking. Do not judge readiness by the softness of the skin alone: the thickest flesh beside the backbone must also be thawed.
Common Problems and How to Fix Them
Small changes in grip and cutting depth make a bigger difference than trying to work faster. Use the following checks when the fish is proving awkward.
| Problem | What to change |
|---|---|
| Scales scatter across the worktop | Work over a deep tray and use short scraping strokes, keeping the scaler close to the fish |
| Skin tears while scaling | Reduce pressure and keep the tool at a shallower angle; avoid further hot-water treatment |
| Flesh comes away with the skin | Free more of the skin with your thumb before pulling, and keep the initial cuts shallower |
| The fish or board keeps slipping | Stabilise the board with a damp cloth and improve your grip with kitchen paper or a suitable clean glove |
| The body will not separate from the head and skin | Find the remaining attachment and release it deliberately instead of pulling harder |
Do not chase a ten-second cleaning time. A tidy separation that preserves the flesh is more useful than a fast movement that tears the fish or sends the knife towards your supporting hand. Speed comes naturally once the sequence is familiar.
Keep the Prepared Fish in Good Condition
Move cleaned perch to a clean plate or covered container and keep them chilled until cooking. Store raw fish below ready-to-eat foods so that juices cannot drip onto them, and clean the board, knife, worktop and your hands after preparation.
Use kitchen paper to remove loose scales and debris rather than spraying the fish under a running tap. Washing raw fish does not disinfect it, and splashes spread raw juices around the sink. Cook perch thoroughly; the flesh should become opaque and separate readily with a fork.
For skin-on perch, dry the surface well before it goes into the pan. For the skin-off body shown in the photographs, a light coating of seasoned flour gives a simple frying option. Either way, take care over the remaining bones when serving, especially when preparing portions for children.
If you are also planning your next catch, browse our perch fishing guides for tackle, baits and seasonal tactics.